Toyota Corolla Cross: Installation
INSTALLATION
CAUTION / NOTICE / HINT
COMPONENTS (INSTALLATION)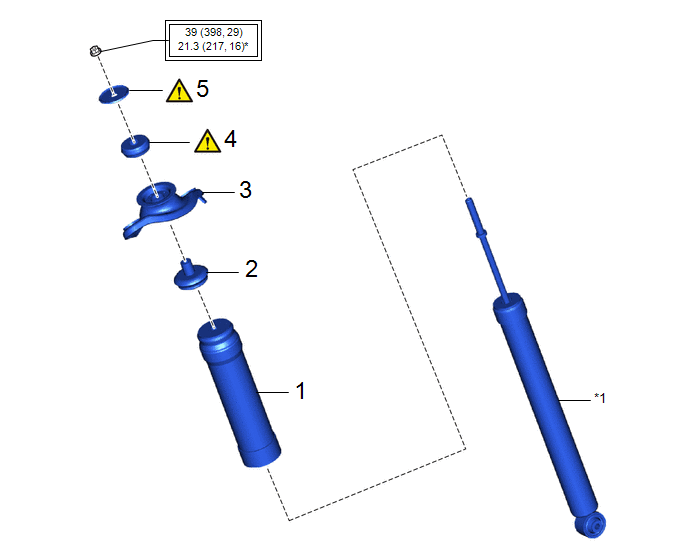
|
Procedure |
Part Name Code |
.png) |
.png) |
.png) |
|
|---|---|---|---|---|---|
|
1 |
REAR NO. 1 SPRING BUMPER |
48341B |
- |
- |
- |
|
2 |
REAR SUSPENSION SUPPORT STOPPER |
48752A |
- |
- |
- |
|
3 |
REAR SUSPENSION SUPPORT ASSEMBLY |
48760B |
- |
- |
- |
|
4 |
REAR SUSPENSION SUPPORT |
48755 |
|
- |
- |
|
5 |
REAR NO. 1 SHOCK ABSORBER CUSHION WASHER |
48530B |
|
- |
- |
|
*1 |
REAR SHOCK ABSORBER ASSEMBLY |
- |
- |
.png) |
Tightening torque for "Major areas involving basic vehicle performance such as moving/turning/stopping" : N*m (kgf*cm, ft.*lbf) |
* |
For use with a ball joint lock nut wrench |
|
Procedure |
Part Name Code |
|
|
|
|
|---|---|---|---|---|---|
|
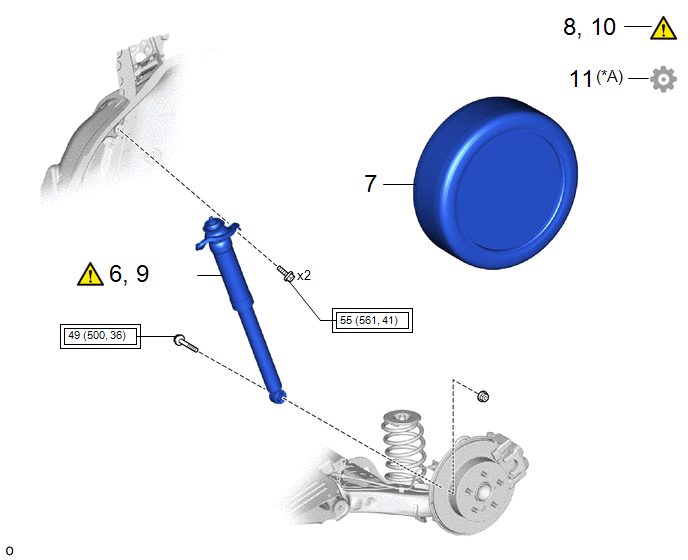
6 |
TEMPORARILY INSTALL REAR SHOCK ABSORBER ASSEMBLY |
48540E |
|
- |
- |
|
7 |
REAR WHEEL |
- |
- |
- |
- |
|
8 |
STABILIZE SUSPENSION |
- |
|
- |
- |
|
9 |
FULLY TIGHTEN REAR SHOCK ABSORBER ASSEMBLY |
48540E |
|
- |
- |
|
10 |
INSPECT REAR WHEEL ALIGNMENT |
- |
|
- |
- |
|
11 |
PERFORM CALIBRATION |
- |
- |
- |
|
|
*A |
w/ Parking Assist Monitor System |
- |
- |
|
|
Tightening torque for "Major areas involving basic vehicle performance such as moving/turning/stopping" : N*m (kgf*cm, ft.*lbf) |
- |
- |
CAUTION / NOTICE / HINT
HINT:
- Use the same procedure for the RH side and LH side.
- The following procedure is for the LH side.
PROCEDURE
1. INSTALL REAR NO. 1 SPRING BUMPER
2. INSTALL REAR SUSPENSION SUPPORT STOPPER
3. INSTALL REAR SUSPENSION SUPPORT ASSEMBLY
4. INSTALL REAR SUSPENSION SUPPORT
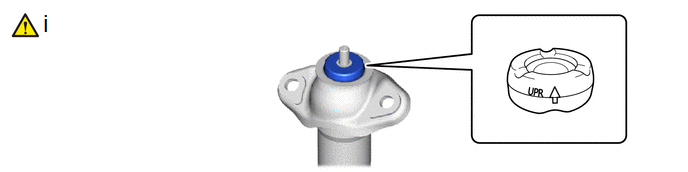
(1) Install the rear suspension support as shown in the illustration.
5. INSTALL REAR NO. 1 SHOCK ABSORBER CUSHION WASHER
|
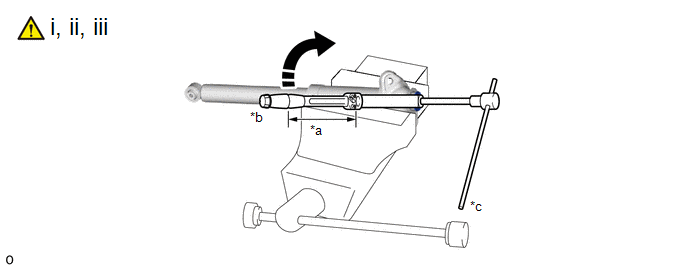
*a |
Torque Wrench Fulcrum Length |
*b |
Turn |
|
*c |
Hold |
- |
- |
(1) Secure the rear shock absorber assembly in a vise using aluminum plates.
NOTICE:
Do not overtighten the vise.
(2) Install the rear No. 1 shock absorber cushion washer to the rear shock absorber assembly.
(3) Using a ball joint lock nut wrench and a 6 mm hexagon socket wrench, hold the rear shock absorber rod and tighten a new rear support to rear shock absorber nut.
Torque:
Specified tightening torque :
39 N·m {398 kgf·cm, 29 ft·lbf}
NOTICE:
Securely insert the 6 mm hexagon socket wrench into the rear shock absorber rod to prevent damage to the rear shock absorber assembly when tightening the rear support to rear shock absorber nut.
HINT:
- Calculate the torque wrench reading when changing the fulcrum length of
the torque wrench.
Click here
.gif)
- When using a ball joint lock nut wrench (fulcrum length of 149 mm (5.87
in.)) + torque wrench. (fulcrum length of 255 mm (10.04 in.)):
21.3 N*m (217 kgf*cm, 16 ft.*lbf)
6. TEMPORARILY INSTALL REAR SHOCK ABSORBER ASSEMBLY
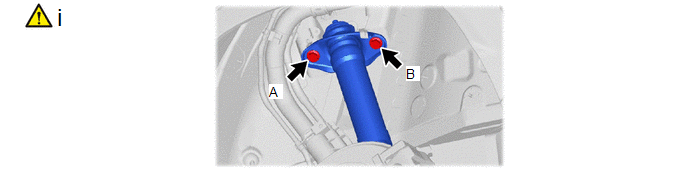
(1) Install the upper end of the rear shock absorber assembly to the vehicle with the 2 bolts.
Torque:
55 N·m {561 kgf·cm, 41 ft·lbf}
NOTICE:
Temporarily tighten the bolt (A) and then fully tighten the 2 bolts in the order of (B) and (A).
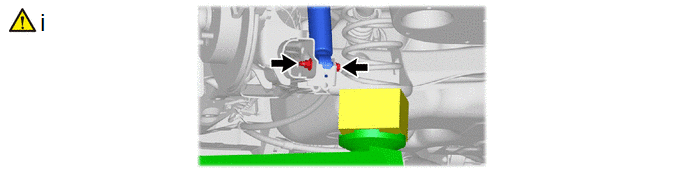
(1) Temporarily install the rear shock absorber assembly to the rear axle beam assembly with the bolt and nut.
NOTICE:
Because the nut has its own stopper, do not turn the nut. Tighten the bolt with the nut secured.
7. INSTALL REAR WHEEL
Click here
8. STABILIZE SUSPENSION
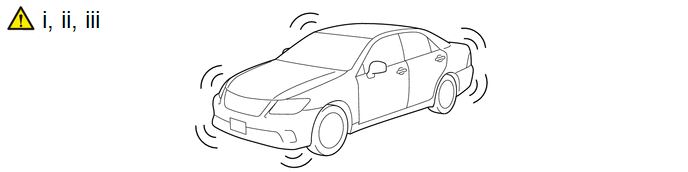
(1) Lower the vehicle.
(2) Bounce the vehicle up and down several times to stabilize the suspension.
(3) Measure the vehicle height.
Click here
9. FULLY TIGHTEN REAR SHOCK ABSORBER ASSEMBLY
|
|
NOTICE: Because the nut has its own stopper, do not turn the nut. Tighten the bolt with the nut secured. |
Torque:
49 N·m {500 kgf·cm, 36 ft·lbf}
10. INSPECT REAR WHEEL ALIGNMENT
Click here
11. PERFORM CALIBRATION (w/ Parking Assist Monitor System)
|
Parking assist monitor system |
|
|
Automatic headlight beam level control system |
|


