Toyota Corolla Cross: Removal
REMOVAL
CAUTION / NOTICE / HINT
COMPONENTS (REMOVAL)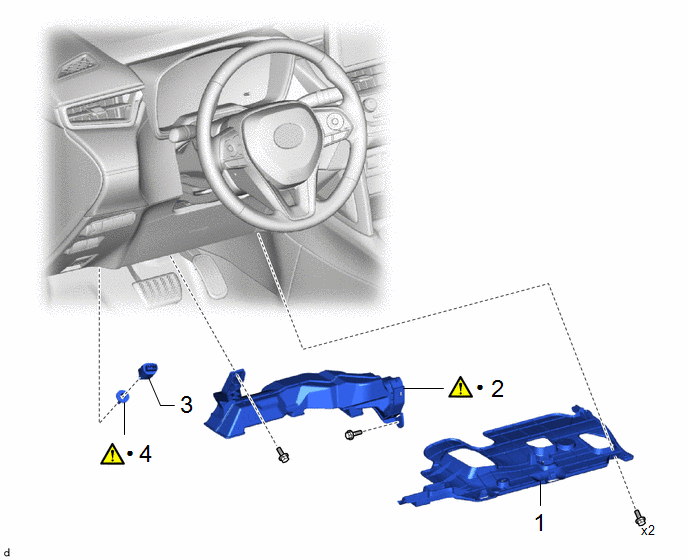
|
Procedure | Part Name Code |
.png) |
.png) |
 |
|---|---|---|---|---|---|
|
1 | NO. 1 INSTRUMENT PANEL UNDER COVER SUB-ASSEMBLY |
55606 | - |
- | - |
|
2 | NO. 1 AIR DUCT |
87211 |
|
- | - |
|
3 | STOP LIGHT SWITCH ASSEMBLY |
84340 | - |
- | - |
|
4 | STOP LIGHT SWITCH MOUNTING ADJUSTER |
84345 |
|
- | - |
|
● | Non-reusable part |
- | - |
PROCEDURE
1. REMOVE NO. 1 INSTRUMENT PANEL UNDER COVER SUB-ASSEMBLY
Click here
.gif)
2. REMOVE NO. 1 AIR DUCT
|
|
Click here |
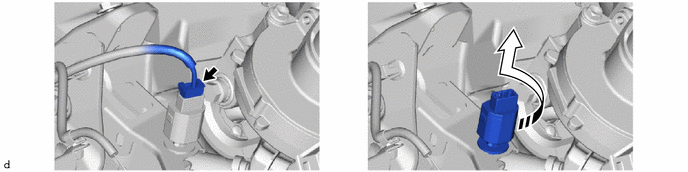
3. REMOVE STOP LIGHT SWITCH ASSEMBLY
.png) |
Remove in this Direction |
- | - |
4. REMOVE STOP LIGHT SWITCH MOUNTING ADJUSTER

(1) Using a screwdriver with its tip wrapped with protective tape, disengage the claws to remove the stop light switch mounting adjuster.
NOTICE:
The stop light switch mounting adjuster must not be reused.


