Toyota Corolla Cross: Transfer Oil
Components
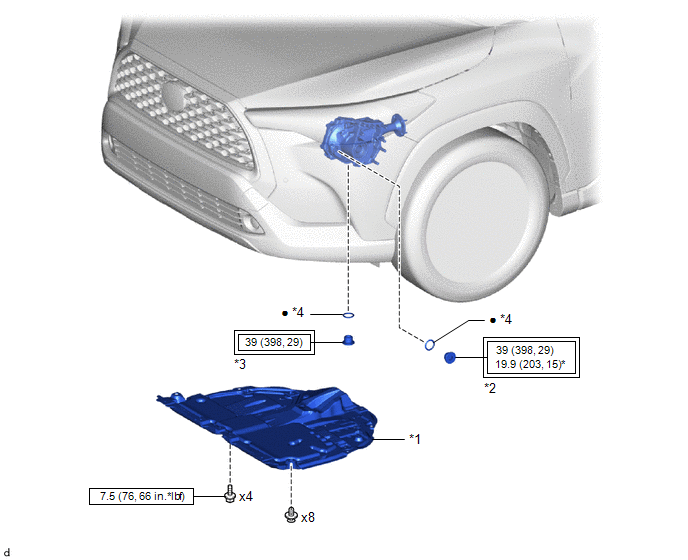
COMPONENTS
ILLUSTRATION
|
*1 |
NO. 1 ENGINE UNDER COVER ASSEMBLY |
*2 |
TRANSFER FILLER PLUG |
|
*3 |
TRANSFER DRAIN PLUG |
*4 |
GASKET |
.png) |
Tightening torque for "Major areas involving basic vehicle performance such as moving/turning/stopping": N*m (kgf*cm, ft.*lbf) |
.png) |
N*m (kgf*cm, ft.*lbf): Specified torque |
|
* |
For use with SST and union nut wrench |
● |
Non-reusable part |
On-vehicle Inspection
ON-VEHICLE INSPECTION
CAUTION / NOTICE / HINT
NOTICE:
- The plug shown in the illustration is not the transfer filler plug, so do
not attempt to fill transfer oil via this plug.
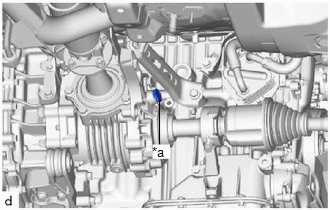
*a
NOT the Transfer Filler Plug
- Filling transfer oil via this plug will cause the transfer oil to be overfilled, resulting in oil leakage.
PROCEDURE
1. REMOVE NO. 1 ENGINE UNDER COVER ASSEMBLY
Click here .gif)
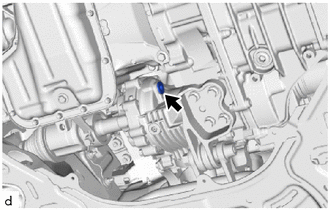
2. INSPECT TRANSFER OIL
(a) Stop the vehicle on a level surface.
|
(b) Using a 10 mm straight hexagon wrench and 10 x 12 mm long offset wrench, remove the transfer filler plug and gasket. |
|
|
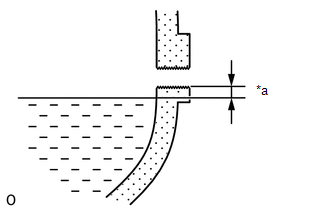
(c) Check that the oil level is between 0 to 5 mm (0 to 0.197 in.) from the bottom lip of the transfer filler plug hole. If the result is not as specified, add transfer oil. Standard oil type and viscosity: Toyota Genuine Differential Gear Oil LT 75W-85 GL-5 or equivalent NOTICE:
|
|
(d) If the oil level is low, refill oil after checking for oil leaks.
|
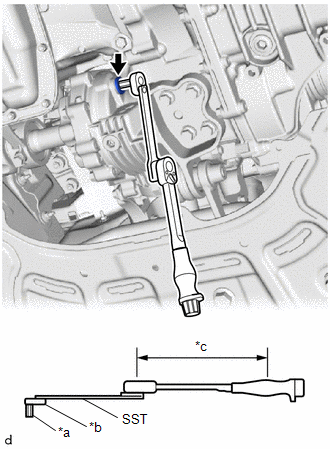
(e) Using SST, 10 mm straight hexagon wrench and 10 mm union nut wrench, install a new gasket and the transfer filler plug. SST: 09961-00950 Torque: Specified tightening torque : 39 N·m {398 kgf·cm, 29 ft·lbf} HINT:
|
|
3. INSTALL NO. 1 ENGINE UNDER COVER ASSEMBLY
Click here
Replacement
REPLACEMENT
CAUTION / NOTICE / HINT
Click here .gif)


