Toyota Corolla Cross: Installation
INSTALLATION
CAUTION / NOTICE / HINT
COMPONENTS (INSTALLATION)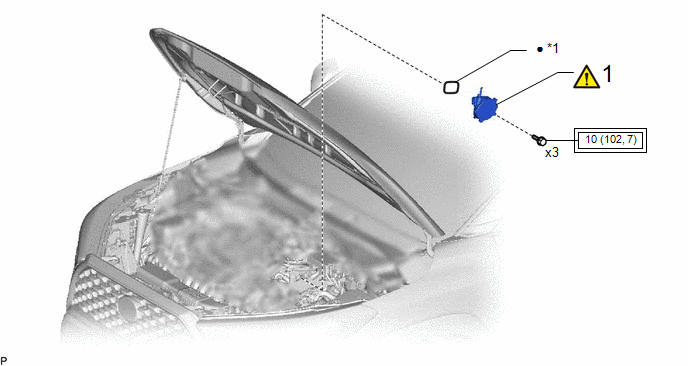
|
Procedure |
Part Name Code |
.png) |
.png) |
.png) |
|
|---|---|---|---|---|---|
|
1 |
VACUUM PUMP ASSEMBLY |
29300 |
|
- |
- |
|
*1 |
NO. 1 VACUUM PUMP O-RING |
- |
- |
.png) |
Tightening torque for "Major areas involving basic vehicle performance such as moving/turning/stopping" : N*m (kgf*cm, ft.*lbf) |
● |
Non-reusable part |
|
Procedure |
Part Name Code |
|
|
|
|
|---|---|---|---|---|---|
|
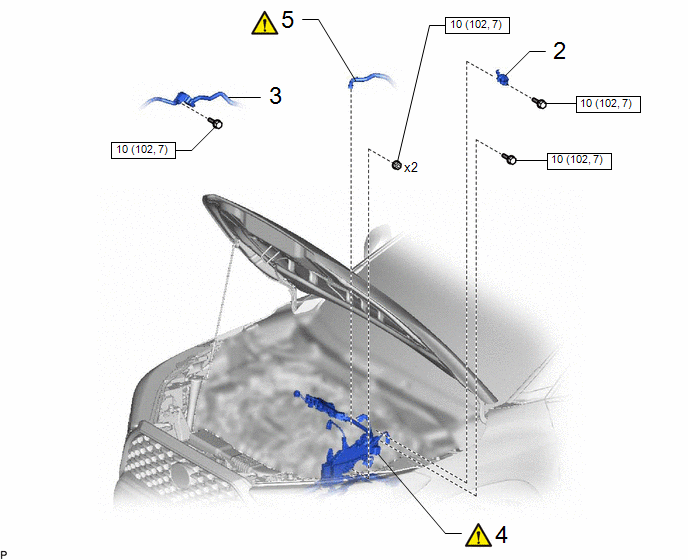
2 |
NO. 3 WATER HOSE CLAMP BRACKET |
16575F |
- |
- |
- |
|
3 |
VACUUM SURGE TANK |
25719 |
- |
- |
- |
|
4 |
ENGINE WIRE |
82121 |
|
- |
- |
|
5 |
NO. 1 VACUUM HOSE CONNECTOR |
44777 |
|
- |
- |
.png) |
N*m (kgf*cm, ft.*lbf): Specified torque |
- |
- |
|
Procedure |
Part Name Code |
|
|
|
|
|---|---|---|---|---|---|
|
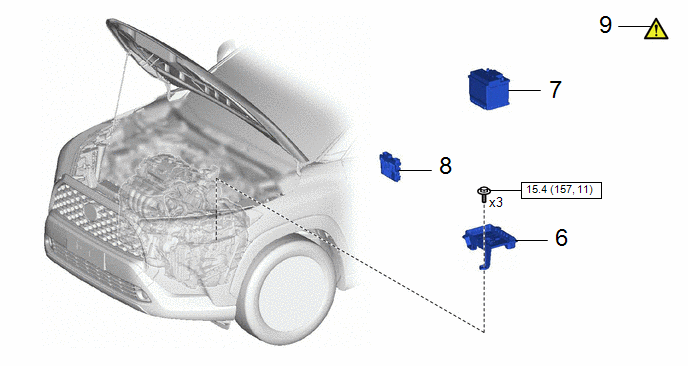
6 |
BATTERY CLAMP SUB-ASSEMBLY |
74404A |
- |
- |
- |
|
7 |
AUXILIARY BATTERY |
- |
- |
- |
- |
|
8 |
ECM |
89661 |
- |
- |
- |
|
9 |
INSPECT VACUUM PUMP OPERATION |
- |
|
- |
- |
|
|
N*m (kgf*cm, ft.*lbf): Specified torque |
- |
- |
CAUTION / NOTICE / HINT
NOTICE:
This procedure includes the installation of small-head bolts. Refer to Small-Head Bolts of Basic Repair Hint to identify the small-head bolts.
Click here .gif)
PROCEDURE
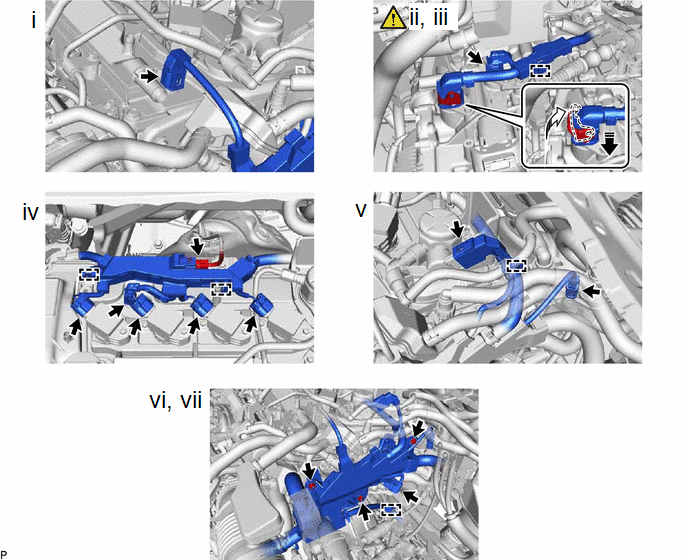
1. INSTALL VACUUM PUMP ASSEMBLY
(a) When reusing the vacuum pump assembly:
|
*a |
Coupling Teeth |
*b |
Groove |
.png) |
Install in this Direction |
- |
(1) Install a new No. 1 vacuum pump O-ring to the vacuum pump assembly.
(2) Install the vacuum pump assembly so that the coupling teeth of the vacuum pump assembly and groove of the camshaft are engaged.
NOTICE:
- Ensure that the vacuum pump assembly is installed securely.
- Be careful not to pinch the No. 1 vacuum pump O-ring.
(3) Using an 8 mm socket wrench, install the vacuum pump assembly with the 3 bolts.
Torque:
10 N·m {102 kgf·cm, 7 ft·lbf}
NOTICE:
After installation, check that there are no gaps between the matching surfaces and that the vacuum pump assembly is not installed at an angle.
2. INSTALL NO. 3 WATER HOSE CLAMP BRACKET
Torque:
10 N·m {102 kgf·cm, 7 ft·lbf}
3. INSTALL VACUUM SURGE TANK
Torque:
10 N·m {102 kgf·cm, 7 ft·lbf}
4. INSTALL ENGINE WIRE
|
|
Connect the connector |
.png) |
Lock the lock lever |
(1) Connect the connector.
(2) Connect the connector and lock the lock lever.
(3) Connect the connector and engage the clamp.
(4) Connect the 6 connectors and engage the 2 clamps.
(5) Connect the 2 connectors and engage the clamp.
(6) Connect the connector and engage the clamp.
(7) Install the engine wire with the bolt and 2 nuts.
Torque:
10 N·m {102 kgf·cm, 7 ft·lbf}
5. CONNECT NO. 1 VACUUM HOSE CONNECTOR

(1) Align the No. 1 vacuum hose connector with the vacuum pump assembly, and push them together until the No. 1 vacuum hose connector makes a "click" sound.
NOTICE:
- Check that there is no foreign matter on the connecting parts.
- After connecting the No. 1 vacuum hose connector, check that the vacuum pump assembly and No. 1 vacuum hose connector are securely connected by pulling on them.
6. INSTALL BATTERY CLAMP SUB-ASSEMBLY
Click here
7. INSTALL AUXILIARY BATTERY
Click here
8. INSTALL ECM
Click here
9. INSPECT VACUUM PUMP OPERATION
Click here


